Tuesday, February 20, 2018

Release 0.2: How I fixed my issue

After the battle with my antivirus for a right to run locally compiled version of Visual Studio Code the most fun part started: fixing the issue.

It is always hard to start working in a new area of code or on something you have not done before. So it all starts with the research. My issue contained a few code pointers, but it was also about 1 year old, so those code pointers where only partly useful.

I took a look at the one of them, but that line didn't even exist at this point. God bless people who write comments! It was easy to identify that part of the code that was originally pointed out was this one:


It's an actual "Collapse All" functionality, I will be using in future. To find another code pointer I had to use good old git blame, but as I found out where it was pointing, I could not figure out why that piece of code was important (and I still can't, so maybe that is a reason why my pull request is Work In Progress and is not merged).

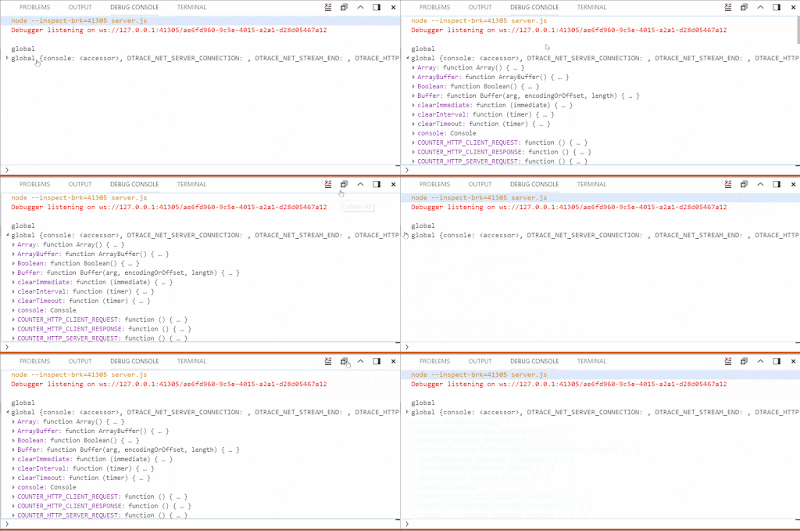
It is crazy how much code I got familiar with in "debug/debug console" while trying to find where the issue was supposed to get fixed. The first piece of code that popped-up was located here and looked like the place where the "neighbor" button "Clear All" was initialized:


Spoiler: wrong place... As I was trying to mimic "Clear All" button initialization, I got a better idea: why not to mimic the actual class, since those two are different. That's exactly what I did:


It was a good idea, as I found out later.

Still... Something was missing button did not magically appear on the screen. So I found another place where "Clear All" button was added to the Debug Console. I decided to try to add my button:


And after that I finally saw my "button", it was an empty placeholder without an icon! It felt like a real miracle. So it was just a matter of finding the right icon and CSS classes at this point.


And finally I got exactly what I wanted:


Even in both light and dark color schemes:


It took quite a long time to get exactly to the place of a change, but as soon as I found out where I need to make changes, fixing this issue become a pleasure.

UPDATE:
I have got a response in my pull request asking to remove button from the title area and add it to context menu. So after all I had to go with the original idea I had:


So here is a gif of what vscode community actually wanted:


Now it is just a matter of time for my PR to be merged!


Thursday, February 15, 2018

Release 0.2: Antivirus vs VS code

These 2 weeks I have been looking for and fixing this issue.

Recently my antivirus got updated... I am using Bitdefender and until this release I have never had problems with it. So one day when I had some time I decided to start working on my  issue. 

In my case the first step was reproducing the bug. So I tried to run vs code and I run into this error:

             [21:02:51] Using gulpfile C:\...\gulpfile.js
             [21:02:51] Starting 'clean-electron'...
             [21:02:51] Finished 'clean-electron' after 6.22 ms 
             [21:02:51] Starting 'electron'...
                ↓ electron-v1.7.9-win32-x64.zip [==============------] 68%events.js:183
                   throw er; // Unhandled 'error' event
                   ^

             Error: read ECONNRESET
                at _errnoException (util.js:1024:11)
                at TLSWrap.onread (net.js:615:25)
           [21:08:18] Syncronizing built-in extensions... 
           [21:08:18] You can manage built-in extensions with the --builtin flag
           [21:08:18] [marketplace] ms-vscode.node-debug@1.21.1 ✔︎
           [21:08:18] [marketplace] ms-vscode.node-debug2@1.21.0 ✔︎
     '".build\electron\Code - OSS.exe"' is not recognized as an internal or external command,
      operable program or batch file.


So after a few hours of research on StackOverflow, I wasn't getting anywhere. It was a lucky coincidence and I decided to check my antivirus. 

It always gives me million notifications about what is happening in the system, but not this time... My Bitdefender just silently blocked executables needed to run VS code.


It took me a while to disable blocking of all the files I needed to run, but I finally managed to restore all the files and finally run my instance of Visual Studio code.

Tip for future: if something goes wrong and you don't have an explanation, check your overprotective antivirus.


Sunday, February 11, 2018

TIL: React Native and Android. Tutorial Edition

This week I have been working on React Native Android application for one of my courses, so I decided to write a tutorial with everything you need to know to get started with React Native.

You can find the full code from this tutorial on GitHub.

I am not planning to go through setup, you can check this blog (it's only for Windows, here is one for Linux and for Mac).

So what happens next after running your app?

Your main page is App.js, so let's take a look what's going on there.

Everything that is under render() function's return is your view, so that's the part you will modify the most, this structure reminds me a little bit of HTML.

On the next few lines we can see styles,

I prefer to keep structure and styles separated in different files.
So let's do that!

To include your stylesheet in App.js you need to export module from your styles file and don't forget to import all the dependencies in your styles file:

In your App.js you have to import this file and use it as a "library":

One of the hardest parts (at least for me) is configuring navigation from page to page.
To add navigation to the project, you have to modify index.js file:


First of all you need to import StackNavigator and create constant property to pass navigation property to it, later on we will use that property to move user from component to component:

Now you need to configure StackNavigator component and make it main/first screen by passing reactNavigation property we have just created. And we need to register StackNavigator component, now when you need to redirect user to the next screen you will use "App" title and your application will know what you are talking about.


Now let's create a few buttons and extra component, so we can play around with our navigation and don't forget to import Button component:


It is highly important to add ".bind(this)" when you call your function, otherwise this.props and this.state won't be available in your function.

So here is my Next.js page:


Now you need to add Next component to index.js file, so it can be accessible by App component. Don't forget to import the page first:

And add the page to StackNavigator:

So let's our app and see how it works:


As you can see Navigation has added a bar at the top of the screen, it's not pretty, so here is a solution on how to can get rid of it. You need to add a few lines in index.js file in you StackNavigator component:


And here is how the app looks now:


I prefer to work with Emulator to work on styling and components, because it's easy to reload and see the changes almost instantly. But sometimes it's important to know how your app would feel on the actual phone.

Here is how you can easily run your android app on your phone.

First of all you need to configure development mode on your mobile device. This configuration may vary for each model, so I am not including it here.
Next step is to connect your phone to your computer using USB cable.
Now to run your application you should bundle it using the following command first (you have to rerun this one every time you make changes in your code):

$ react-native bundle --platform android --dev false --entry-file index.js
--bundle-output android/app/src/main/assets/index.android.bundle
--assets-dest android/app/src/main/res


Now you can run:

$ react-native run-android

And enjoy your awesome application on the phone!

You can find the full code from this tutorial on GitHub.


Tuesday, February 6, 2018

How to contribute to open source without coding skills?

The first thought that you have right now is probably: "It's not possible, she does not know what she is talking about". But give me a chance to prove my point.

If you know languages, you can contribute to open source projects. It doesn't matter if you know "human" or programming languages. Most of the big projects are in need of localization. And if you know more than one "human" language: it's your chance to shine! 

I am a localization contributor as well. I have recently started to translate for Visual Studio Code, so this is what you need to do to join the community:

Step 1: Get a transifex account (it's completely free).

Step 2: Request access to the project.

Step 3: Start contributing!

The website has user-friendly interface, but if you need detailed instruction on how to get started once you have joined an organization, here it is:

1) From your home page go to "Dashboard"


2) Select the project you want to work on

3) Click on "Translate"

4) If translating is available in a few languages you know, you will be asked to select one

5) You will also be asked to select a resource, it is just a subsection of a project


6) On the left you will see a few subcategories of strings


7) On the right side there is a panel where you can suggest translation or vote for one


I have noticed that community is in need of contributors. To have your translation be accepted you need to have 1 more vote from another contributor. I have translated a few strings and most of them were not reviewed due to lack of contributors.

And the whole translating process it quite pleasant. It feels like playing a game and may even be addictive. I noticed that when I get involved: it's hard to stop.

Even if you don't want to translate strings you may start as a reviewer, just get involved with terminology and you will be a great fit to translators' community! And don't worry, you will be recognized and even included in release notes under "thank you" header!


Just imagine how many people will see our name and will benefit from 20-30 minutes of your time!


Some helpful links:


It's only a beginning

What have I learned for the past 8 months of Open Source Programming? I was convinced from the very beginning that this course would be i...